Spotify is the app that has revolutionized the online music listening experience, but has got an issue where it starts skipping songs for no reason.
It majorly occurs in Windows 10 but can sometimes be found in mobile devices too.
In this article, I am going to discuss some fixes to the Spotify keeps skippings songs problem
Now let’s get started.
Table of Contents
11 Fixes For Spotify Keeps Skipping Songs On Windows 10
In this article, I am going to tell you 11 fixes for the Spotify keeps skippings songs problem.
Let’s start with the first fix:
Fix 1 – Restart Your Device
The simplest solution to this problem is that you should restart your Windows 10 PC.
After restarting your device just go to Spotify and see if the problem is fixed or not.
If it is fixed then that’s great but if not then go to the next solution.
Fix 2 – Restart Spotify
You can also try to restart your Spotify application and see if it solves the problem.
If the problem is solved then that’s great but if not then try the next fix.
Fix 3 – Clear Cache Files
The next fix is to remove cache files from your Windows 10 computer.
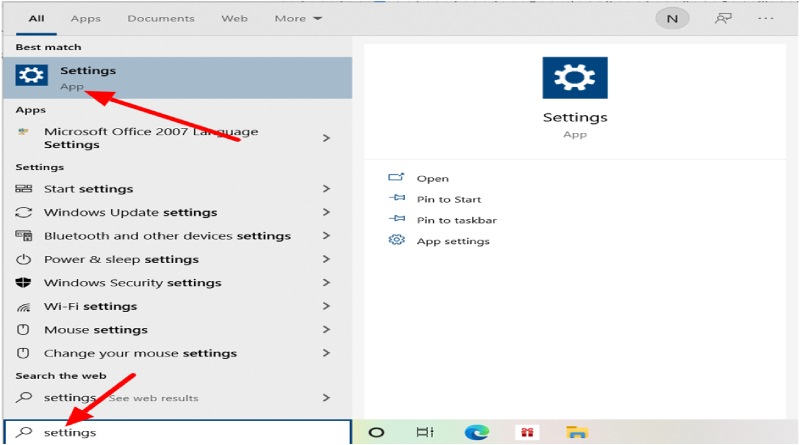
For that, you have to first search settings on the start menu and click on it.
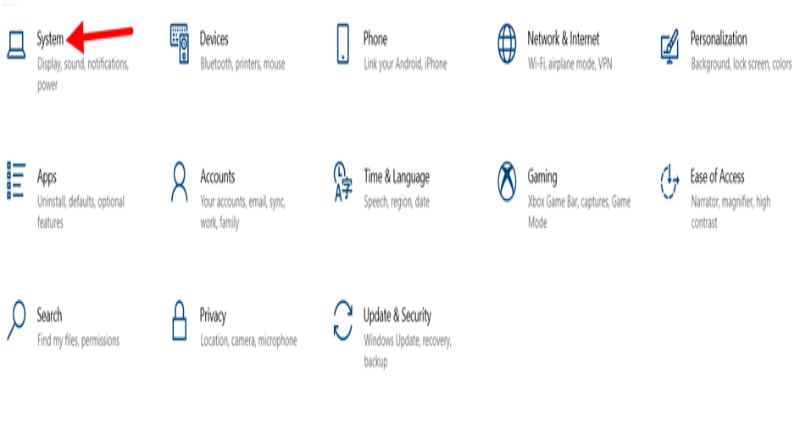
After going there go to the System tab.
Click on the storage section in the left sidebar and click on the temporary files link.
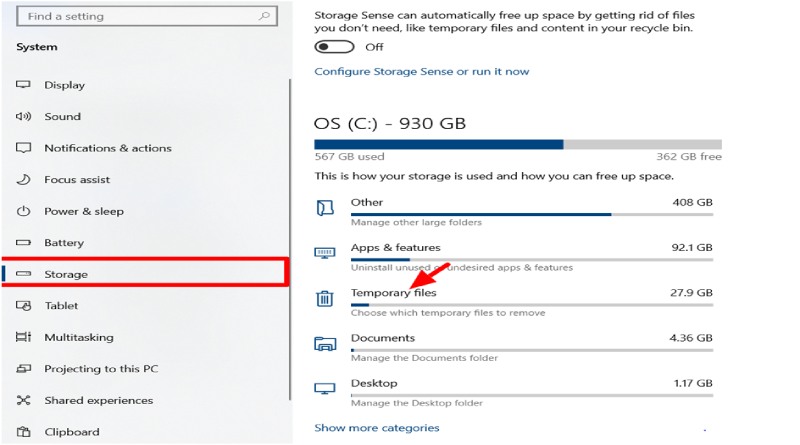
After that choose which cache files you want to remove and which you want to keep.
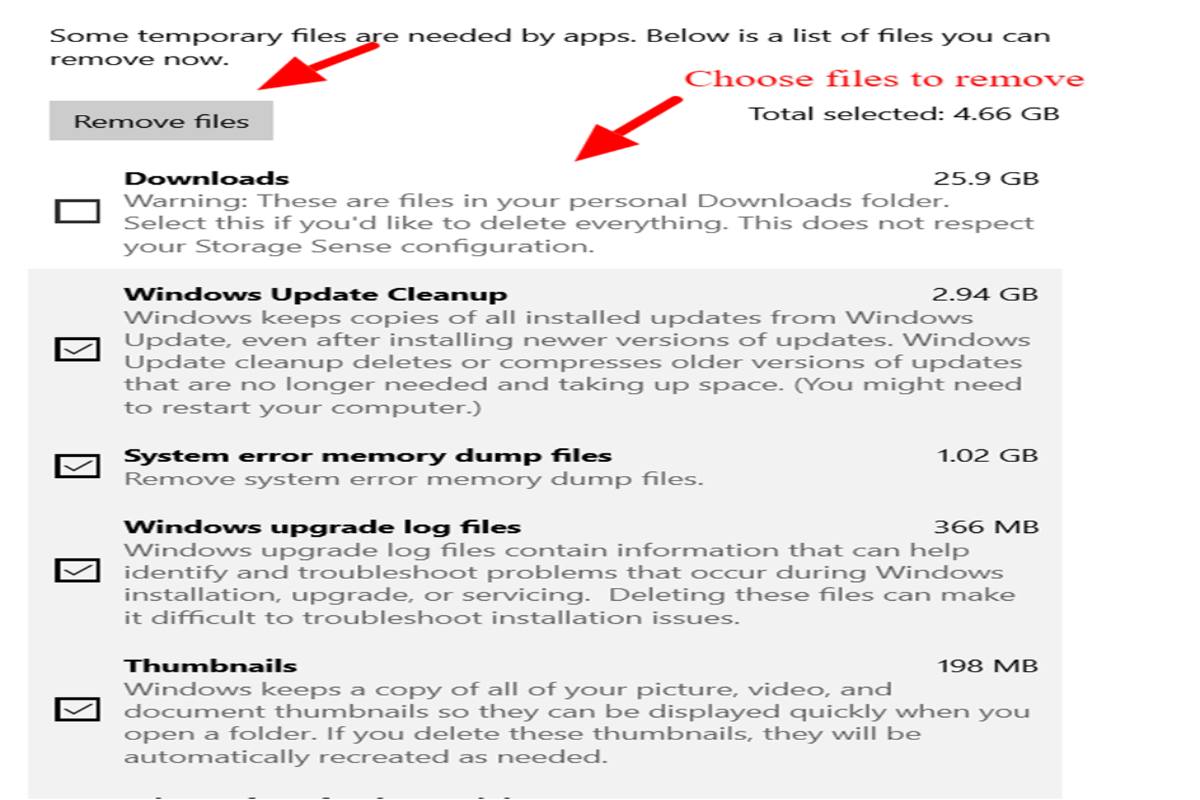
Wait till the process ends.
After that check if the problem is fixed then it is ok but if not then try the next fix.
Fix 4 – Install Spotify Again
The next fix is to uninstall and then after some time install the Spotify application again.
This could fix the problem of skipping songs.
However, if the problem is not fixed then try the next fix.
Fix 5 – Check If Your Router Is Working Properly
The skipping songs problem could be due to the bad internet connection.
So, check if your router is working properly and if not then fixing the router might fix this problem too.
If the problem is fixed then enjoy the songs but if not then try the next fix.
Fix 6 – Log Out And Log In Again
The next method with which can fix this issue is to log out and then after some time log back into your Spotify account.
However, if this tactic doesn’t work then click the log out from everywhere button by going to your Spotify account.
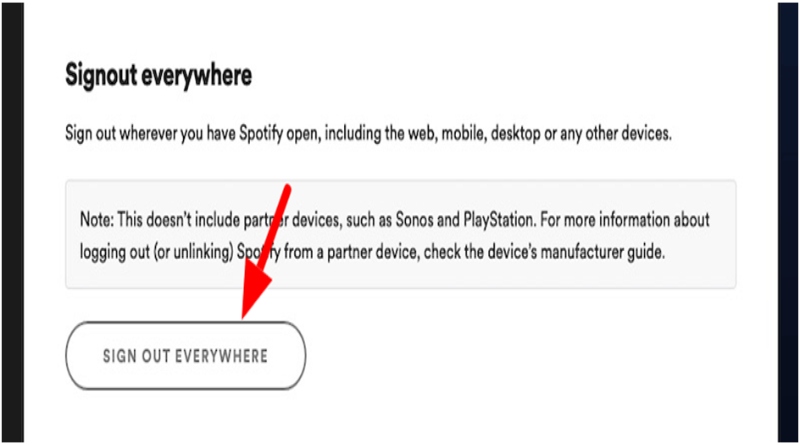
One by one log back into each of your devices and see if you are getting this issue in one of your particular devices or all of them.
If the problem is in all the devices, then the fault could be within Spotify itself.
Fix 7 – Make Sure You Are In Online Mode
This error is only for the Spotify premium user as you get offline mode only in the premium version.
To see if the Spotify application is in online mode first click on three-dot on the top and under the file section, you get this option.
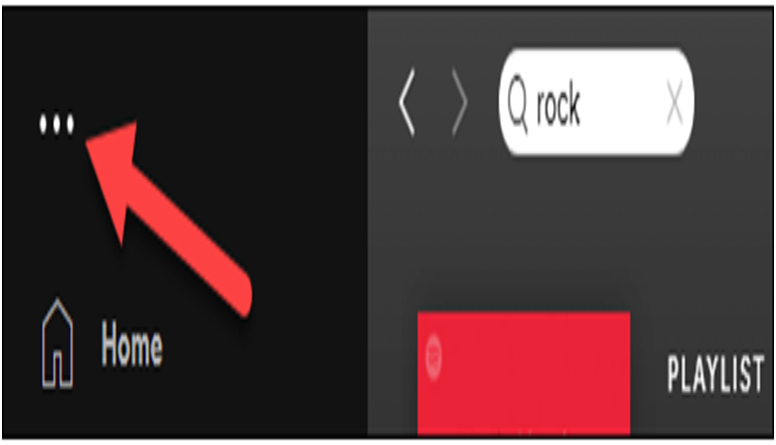
If it is in offline mode then go online it would hopefully fix the problem.
Fix 8 – Lower The Music Streaming Quality
Streaming the music on a higher streaming quality using a weak internet connection can cause this issue.
So, to fix that go to the settings tab under the dropdown menu.
Under the audio quality tab lower the streaming quality that’s it.
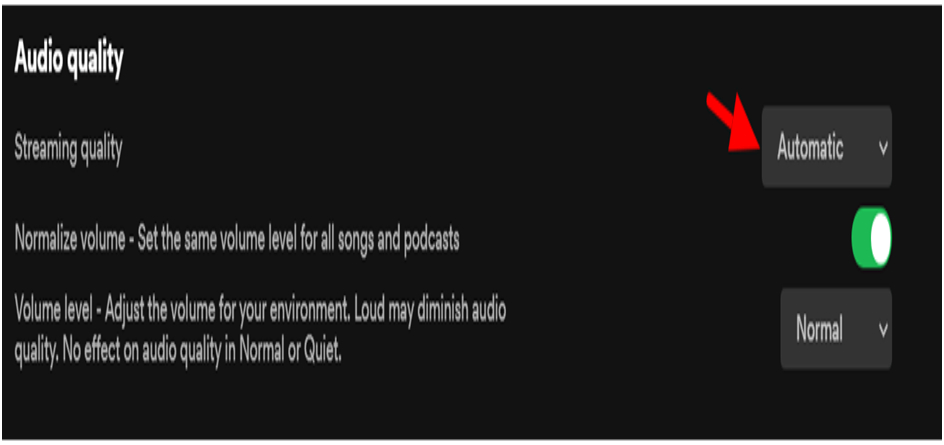
If the problem is still not fixed then try the next hack.
Fix 9 – Update Spotify Application
The next way to fix this Spotify issue is by updating the Spotify application.
This would fix all the issues within Spotify and would help you provide a great music streaming experience.
If this fix would solve the problem, then that’s great but if not then try the next fix.
Fix 10 – Use The Offline Mode
This is again a Spotify premium method as in this method you have to download the songs on Spotify for offline use and it is available for premium users only.
After downloading the songs on Spotify just enable the offline mode from here.
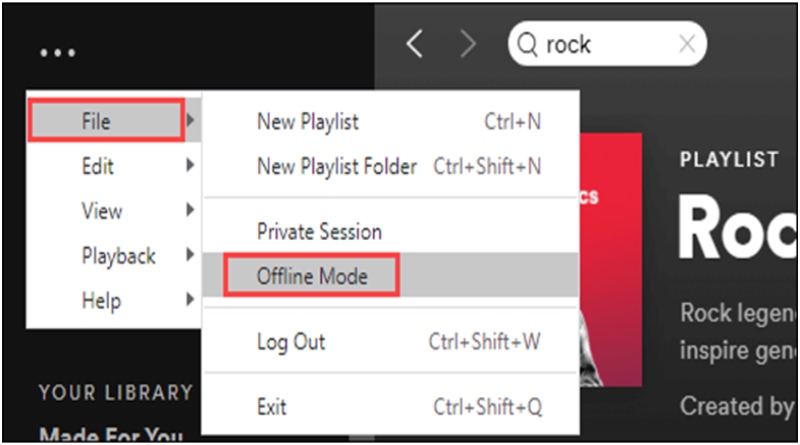
This would fix this issue of skipping the songs in Spotify permanently and only those songs would be skipped which are not available for offline use.
Fix 11 – Disable Hardware Acceleration
This is the last fix to this problem where you have to turn off the hardware acceleration settings in Spotify.
To turn off the hardware acceleration in Spotify first go to its settings section.
Under the settings go to the compatibility section and turn off hardware acceleration.

Over To You!
Now as I have previously said too that if the problem is still there after using all these hacks, then the problem is from the Spotify end.
In this case, you have to wait until Spotify releases an update in which this problem would be fixed.
Now you tell me in the comments that how many times you have faced this issue on your Spotify app?
Also, one request please share this blog post with your friends so it can help other people like you.
Author Bio
I am Shubhaa, the face behind CrazeForGadgets.com. I am a fitness enthusiast and love to experiment with new things. I am very much attracted to gadgets and love to explore everything about anything launched. Being a Science Graduate, I am always fascinated by new things.
Also Read: How to Unlock iPhone Without Passcode?
Related posts
Hot Topics
Metaverse Platforms for Virtual Workspaces
Ever felt like your office is stuck in the Stone Age? Tired of endless Zoom calls that feel about as…
IoT Protocols: The Language of Smart Devices
Ever wonder how your smart fridge talks to your phone? Or how does your fitness tracker know to buzz when…

